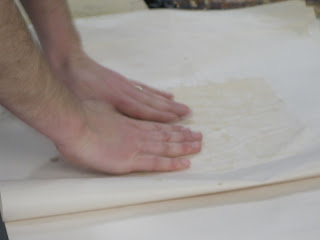
This week we continued learning about intaglio printing with Bernie.
Requirements:
- bath of ferric chloride (corrosive salt)
- file
- burnishing/scraping tool
- protective gloves
- printing ink
- small rectangles of clean, firm card
- quarter sheets of yellow pages type paper
- tarlatan cloth
- spare clean rags
- plenty of clean newspaper
- water bath for the printing paper
- clean butchers paper
- etching paper (300gsm) torn to the required size (no pencil marks or scissors!)
- templates for the placement of the plate and paper
- a printing press!! (or steam roller)
- turpentine
Etching the copper plate
I forget to get a picture of this process!
Etching needs to be done in a dedicated space, with protective rubber gloves, a bucket of clean water and a timer.
The copper plate has four small 'feet' of blu tack placed on the printing side and it is then placed blu tacked side down into the shallow bath of ferric chloride. The time of the bath depends on the strength of the chloride and it is worth doing a test, covering parts of the plate with masking tape, then immersing it in the bath for periods of time (which you record!) and looking at the result, perhaps doing a test print before deciding on an immersion time for the plate.
We were re-using ferric chloride, so immersed our plates for about 45 minutes.
We took the plates out of the ferric chloride and immersed them into a bucket of clean water, then dried them off.
We then took the plates to a well ventilated area and cleaned the bitumen off with turpentine. The cleaned plates were then ready to be prepared for printing.
Preparing the copper plate edges for printing
The edges of the copper plate need to filed, scraped and burnished so that the print doesn't have an unintended border. The plate will need to be filed quite firmly so use a brace board or similar to prevent it from slipping.
The edge needs to be filed to 45º. File until you can see about 1mm of clean copper.
When the edges are ready, give the plate a polish to remove fingerprints or other marks.
The plate is now prepared for the ink.
Preparing the area being used for printing
We used oil based ink, but water based acrylic inks are also available. It is essential to wear protective gloves for this process.
It is also worthwhile to have a designated 'dirty' area for inking the plate and a 'clean' area for handling paper and printing.
Cover the 'dirty' area with clean newspaper.
Prepare the water bath at the 'clean' area and have sheets of butchers paper next to the water bath ready to blot the printing paper prior to printing.
Have clean butchers paper for the paper to lie on once it is blotted and you are preparing the press.
Inking the plate
Squeeze out a small amount of ink and use a piece of card to scrape it firmly across the plate. First one way...
then the other.
When the ink has been applied rub the plate with a piece of tarlatan cloth, which pushes the ink into the etched lines. It also removes excess ink from the plate.
Use a piece of rag to remove any ink from the bevelled edges.
When the plate is clean give it a polish with a piece of the cut up yellow pages. Great re-cycling!
Give the back of the plate a wipe to remove ink, but don't overdo it as you will get the printing surface dirty again. Now put the plate in the clean area, near the printing press while preparing the paper.
Only one print is made at a time.
After each print the plate is re-inked and the plastic protector sheet on the press cleaned to remove any ink left from the back of the copper plate.
Printing
From this point on it is essential to have clean hands.
Place pieces of printing paper, torn to the correct size, in the clean water bath.
Make sure that each piece of paper is properly wet before adding another piece.
The paper is put aside on clean butchers paper while the press is prepared.
Bernie had already done a test print to check that the pressure on the print rollers was going to produce an even print on our paper.
 |
| Bernie pointing out where the press roller needs more pressure to achieve an even print |
Ensure that the surface of the plastic is clean. Clean rags should be nearby to make sure of this.
Then place the copper plate on the template (which is under the plastic!) - print side up (don't laugh, I nearly put mine print side down)
Carefully lay the paper in the place marked on the template, ensuring it is oriented the right way (particularly important if you have made the lower border wider than the sides and top borders).
Lay the two mats on the paper. The woven, thinner one on the paper, the thicker, felt one on top.
Time to turn the wheel and print!
Remove the blankets and look at your print. If your fingers are not really clean you can make a little holder as shown here.
The prints should be dried between sheets of clean butchers paper, with weights on top, to ensure that the paper dries flat, rather than buckling as it dries.
Some of our prints.


